
A clean kitchen makes every home feel more comfortable. It’s where meals are prepared, conversations happen, and family members naturally gather throughout the day. The challenge is that kitchens also become dirty faster than almost any other room in the house. Grease builds up, crumbs collect in corners, fingerprints appear on appliances, and before you know it, the space feels overwhelming.
The good news is that a deep clean doesn’t have to take your entire afternoon. With the right strategy, a little preparation, and a systematic approach, you can refresh your kitchen in less than an hour. The key isn’t cleaning harder — it’s cleaning smarter.
Whether you’re preparing for guests, staying on top of your weekly chores, or simply want a fresh start, this guide will help you maximize every minute.
Many homeowners looking for house cleaning Plano TX solutions often discover that adopting professional cleaning habits can dramatically reduce the time spent maintaining their homes. Even if you prefer handling the work yourself, learning efficient techniques can make every cleaning session much easier.
Before You Start: Gather Everything First
One of the biggest time-wasters during cleaning is constantly walking back and forth to grab supplies. Before you begin, place everything you’ll need in a small cleaning caddy.
Your supplies should include:
- Microfiber cloths
- All-purpose cleaner
- Degreaser
- Glass cleaner
- Dish soap
- Baking soda
- White vinegar
- Scrub sponge
- Trash bags
- Vacuum or broom
- Mop
Having everything within reach allows you to move continuously without unnecessary interruptions.
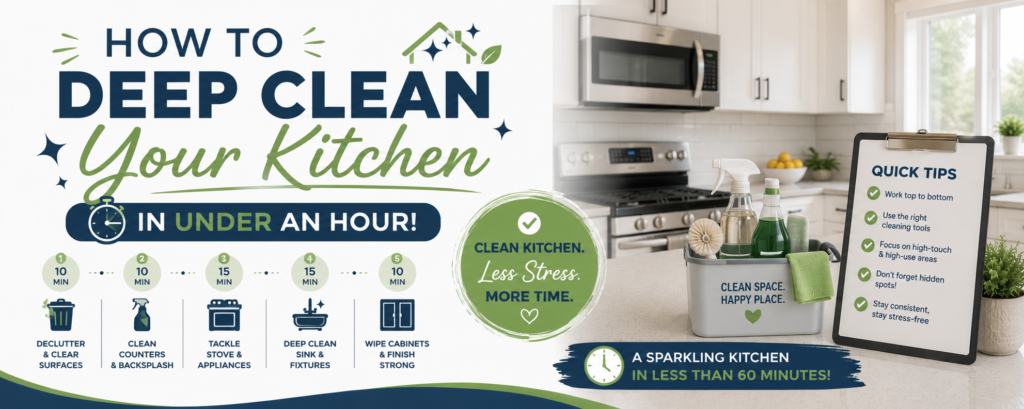
Set a 60-Minute Timer
Working against the clock keeps you focused. Instead of cleaning until you’re tired, divide your time into manageable sections.
A simple schedule looks like this:
- 5 minutes: Declutter
- 10 minutes: Countertops and sink
- 10 minutes: Appliances
- 10 minutes: Cabinets and backsplash
- 10 minutes: Stove and microwave
- 10 minutes: Floors
- 5 minutes: Final touch-ups
This structure keeps the project moving while preventing you from spending too much time on one area.
Step One: Remove Everything That Doesn’t Belong
Start by clearing your counters.
Put away:
- Grocery bags
- Small appliances you’re not using
- Dirty dishes
- Water bottles
- Children’s cups
- Random clutter
An uncluttered kitchen instantly feels cleaner, even before any surfaces are wiped down.
If dishes are stacked in the sink, load the dishwasher or wash them immediately. Don’t leave them until the end.
Step Two: Spray Before You Scrub
Professional cleaners know an important secret.
Don’t immediately begin scrubbing.
Instead:
- Spray the sink.
- Spray the stovetop.
- Spray greasy cabinet doors.
- Spray inside the microwave.
- Spray countertops.
Allow the cleaners several minutes to break down grease and food residue while you work elsewhere.
This reduces scrubbing time significantly.
Step Three: Empty the Trash
Take out the garbage before cleaning anything else.
Old food odors can linger and make an otherwise clean kitchen smell unpleasant.
Replace the liner immediately so you’re ready to collect any additional trash during the cleaning process.
Step Four: Start from the Top
Gravity always wins.
Dust and crumbs fall downward, so clean upper areas first.
Wipe:
- Upper cabinet doors
- Shelves
- Range hood
- Refrigerator top
- Light fixtures
- Window ledges
Once these areas are clean, move downward toward the counters.
This prevents double work.
Step Five: Focus on High-Touch Surfaces
Think about everything your hands touch throughout the day.
These include:
- Refrigerator handles
- Microwave buttons
- Cabinet pulls
- Drawer handles
- Faucet
- Light switches
- Coffee maker buttons
These surfaces accumulate fingerprints, oils, and bacteria surprisingly quickly.
A quick disinfecting wipe makes a noticeable difference.
Step Six: Power Clean the Sink
The sink often becomes the dirtiest spot in the kitchen.
Sprinkle baking soda across the surface.
Scrub using a damp sponge.
Pay extra attention to:
- Drain edges
- Faucet base
- Garbage disposal splash guard
Finish by rinsing thoroughly and drying everything with a microfiber towel.
A shiny sink immediately makes the entire kitchen appear cleaner.
Step Seven: Refresh the Microwave in Minutes
Place a microwave-safe bowl filled with water and a splash of vinegar inside.
Heat for three to five minutes.
The steam loosens dried food.
Once finished, simply wipe the interior clean.
This simple trick eliminates the need for aggressive scrubbing.
Step Eight: Degrease the Stove
Grease naturally accumulates around burners.
Use a quality degreaser and let it sit briefly before wiping.
Remove burner grates if needed.
Don’t forget:
- Control knobs
- Oven handle
- Glass cooktop edges
- Behind the burners
Small details create the polished appearance people notice.
Step Nine: Wipe Countertops Efficiently
Instead of cleaning random sections, work in one direction.
Move from left to right or clockwise around the room.
This ensures every surface gets cleaned without missing spots or repeating work.
Lift small appliances only if necessary.
If time is limited, simply wipe around frequently used items.
Step Ten: Clean Cabinet Fronts
Kitchen cabinets quietly collect grease over time.
Even if they don’t look dirty, you’ll often notice grime on your cloth after wiping them down.
Focus on:
- Areas around handles
- Cabinets near the stove
- Lower cabinets touched by children
- Pantry doors
Warm water mixed with a gentle cleaner usually works well for regular maintenance.
Many homeowners searching for a reliable maid service Plano TX appreciate that professionals routinely clean these often-overlooked surfaces during scheduled visits, helping kitchens stay consistently fresh.
Step Eleven: Don’t Forget the Backsplash
Cooking splatters often land behind the stove and sink.
Use a microfiber cloth with an all-purpose cleaner to quickly wipe the backsplash.
Tile grout doesn’t need deep scrubbing every week.
A simple wipe prevents buildup from becoming permanent.
Step Twelve: Polish Stainless Steel
If your kitchen includes stainless appliances, finish them last.
Always wipe with the grain rather than against it.
Use a dry microfiber cloth afterward to remove streaks.
Even older appliances look newer after a quick polish.
Step Thirteen: Sweep Before You Mop
Avoid pushing crumbs around with a wet mop.
Sweep thoroughly first.
Pay attention to:
- Under cabinets
- Around the refrigerator
- Beneath stools
- Corners
- Under the dining table
These hidden areas often collect the most debris.
Step Fourteen: Quick Mop for Maximum Shine
You don’t need excessive water.
A lightly damp microfiber mop works quickly while drying faster.
Move backward toward the doorway to avoid stepping on freshly cleaned floors.
Within minutes, your kitchen will feel completely refreshed.
Five Habits That Keep Your Kitchen Cleaner Every Day
Deep cleaning becomes much easier when daily habits prevent major messes.
Consider these simple routines:
- Wash dishes immediately after meals.
- Wipe counters before going to bed.
- Sweep once each evening.
- Empty the trash before it’s overflowing.
- Put groceries away as soon as you get home.
Each habit takes only a few minutes but dramatically reduces future cleaning time.
Common Time-Wasting Mistakes
Many people unintentionally make cleaning take twice as long.
Avoid these habits:
Cleaning Without a Plan
Jumping randomly between tasks creates unnecessary work.
Always clean in the same order.
Using Too Many Products
One quality all-purpose cleaner handles most kitchen surfaces.
Switching products repeatedly slows everything down.
Forgetting to Let Products Work
Cleaners need time to dissolve grease.
Spray first.
Scrub later.
Cleaning Around Clutter
Always clear surfaces before wiping them.
Trying to clean around objects doubles your effort.
Ignoring Small Spills
Fresh spills wipe away in seconds.
Old spills require scrubbing.
Immediate attention saves time later.
Weekly vs. Monthly Deep Cleaning
Not every task needs to happen every week.
Weekly:
- Sink
- Counters
- Floors
- Appliances
- Cabinet fronts
- Trash can
Monthly:
- Inside refrigerator
- Pantry organization
- Oven interior
- Light fixtures
- Baseboards
- Under appliances
Separating these responsibilities prevents cleaning from becoming overwhelming.
Why Efficiency Matters
Cleaning isn’t just about appearance.
A clean kitchen makes cooking more enjoyable, reduces stress, helps eliminate odors, and creates a healthier environment for your family.
More importantly, efficient routines give you something incredibly valuable — your time back.
Instead of spending several hours catching up on neglected chores, you’ll finish quickly and enjoy the rest of your day.
If maintaining a consistent schedule becomes difficult because of work, family responsibilities, or a busy calendar, many residents searching for house cleaners near me Plano discover that combining regular maintenance with occasional professional help keeps their homes in excellent condition without sacrificing valuable personal time.
Likewise, families comparing options for affordable house cleaning Plano often realize that staying organized between cleanings helps maintain results much longer.
Whether you clean your kitchen every week or simply need a fast refresh before company arrives, these time-saving techniques can transform the way you approach household chores. With preparation, smart routines, and a consistent order of operations, deep cleaning your kitchen in under an hour is not only possible — it’s surprisingly achievable.
For homeowners who want an even more polished home while balancing busy schedules, maintaining simple daily habits alongside occasional residential cleaning Plano TX services can make keeping every room clean feel far less overwhelming. A little consistency goes a long way, and your kitchen will continue to be one of the most welcoming spaces in your home.
Contact us at 214–390–3387 or visit https://walomaids.com/plano-tx-house-cleaning-and-maid-service/ to book your service.